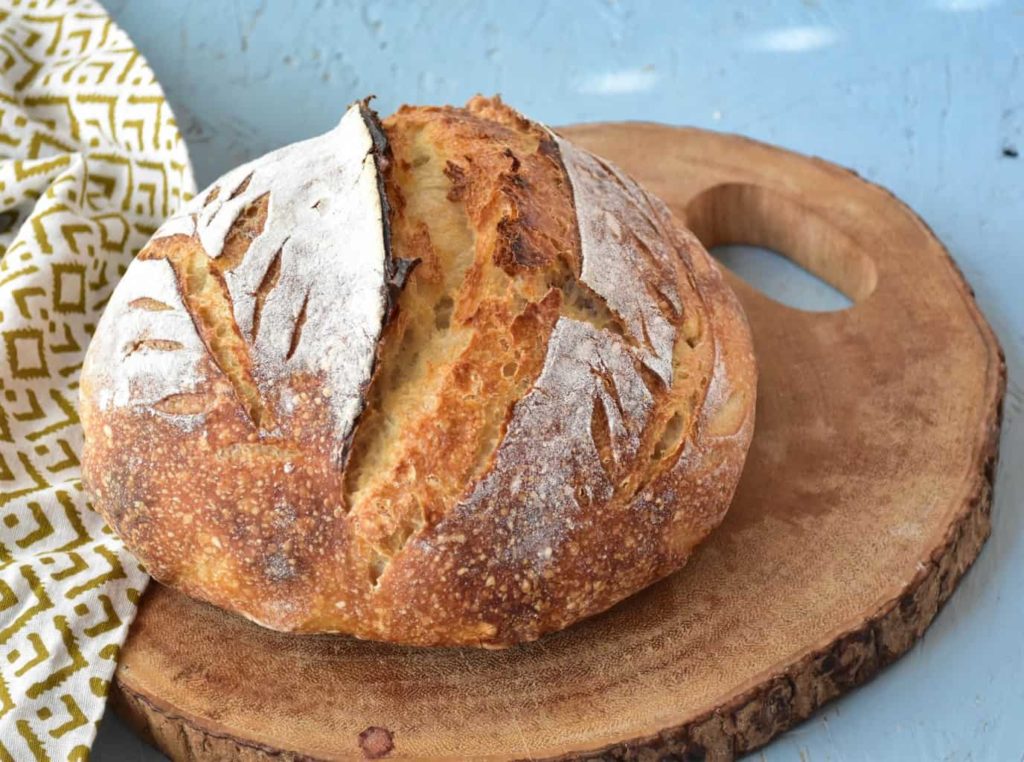
The smell of crusty, chewy sourdough bread at home early in the morning is an experience that will make you feel like you’re walking the markets in Seattle or passing a bakery in Germany. We’ve tested and selected the easiest recipe for you to try making one with your little ones at home.
Making sourdough is not difficult, but it does take patience and preparation. There are three parts to making sourdough: making the Levain (active, recently fed starter), making the dough, and finally baking. From the time you make the Levain to the time your bread is ready to eat usually takes about 24 hours, so be sure to take the time frame into account when you plan your meals!
EQUIPMENT:
1. Mixer with a hook attachment, or you can mix by hand
2. Dutch oven or any pot with a lid that can go in the oven
INGREDIENTS:
Levain:
– 20 grams starter (1:1 ratio)
– 20 grams of water
– 20 grams of bread flour.
Dough:
– 300 grams of bread flour
– 210 grams of water
– 6 grams of salt
– Levain
PART 1
In the morning, mix your ingredients for the Levain in a glass or jar. Let it rest undisturbed until it rises at least double the size. Mark your jar or glass with a whiteboard marker or rubber band so you can easily tell if it has doubled. This usually takes 3-5 hours for Jakarta’s room temperature.
PART 2
– About 1 hour before your Levain is ready, let’s get the dough ready. Using a spoon or by hand, mix your bread flour with water. This is the perfect chance for your little ones to participate. Let it autolyze for at least an hour. Autolyse is a fancy word for giving time for the flour to absorb all the water to make gluten formation easier later.
– After at least an hour, add salt and all of the Levain into the dough and use a stand mixer with the hook attachment to knead the dough for 10-15 minutes, until the dough forms a ball and make sure the bowl is clean on the sides.
– With wet hands, take off the dough hook attachment, cover the mixing bowl with its lid or with a damp towel, and leave to rest for 30 minutes at room temperature.
– Perform coil folds every 40 minutes 2 or 3 times until the dough is smooth and tight-looking. You can perform coil folds by lifting the dough on opposite sides with your finger, causing the other two sides to coil under itself. Then do the same thing to the part that just coiled. Next, leave the dough to rise for an hour.
– Transfer your dough to a floured surface, tuck the sides under itself while rotating the dough to form a ball. Leave to rest for about 20 minutes.
– Finally, pre-shape the dough by folding all four sides and place it upside down in a fitted container that has been lined with a kitchen towel and dusted with flour. Fold over the kitchen towel so that it covers the dough.
– Refrigerate the dough in the container overnight. It will relax and shape itself according to the container.
PART 3
Last 7 steps, and you will have sourdough!
1. Preheat your oven and dutch oven with the lid to the hottest setting your oven allows.
2. Pull out your dough from the refrigerator and transfer your dough, correct side up, to a baking paper.
3. With a razor blade or a very sharp knife, create a slit on top of the dough at a 45-degree angle into the bread.
4. Once the maximum temperature in the oven has been reached, take out the dutch oven, insert your dough, close the lid, and put it back in the oven.
5. If your maximum temperature is 270 degrees celsius, then bake for 8 minutes covered, and then lower the temperature to 190 degrees celsius and bake further with the lid open for 35 minutes.
6. If your maximum temperature is 230-250 degrees celsius, then bake for 20 minutes covered, and then lower the temperature to 210 degrees celsius and bake further uncovered for 20 minutes.
7. After you pull out your bread from the oven, transfer it to a cooling rack immediately. Allow to cool completely before cutting your bread.