Play
- HONG KONG
How To Create Your Own Ant Farm In Your Home?
DIY Ant Farm Science Project With Your Family

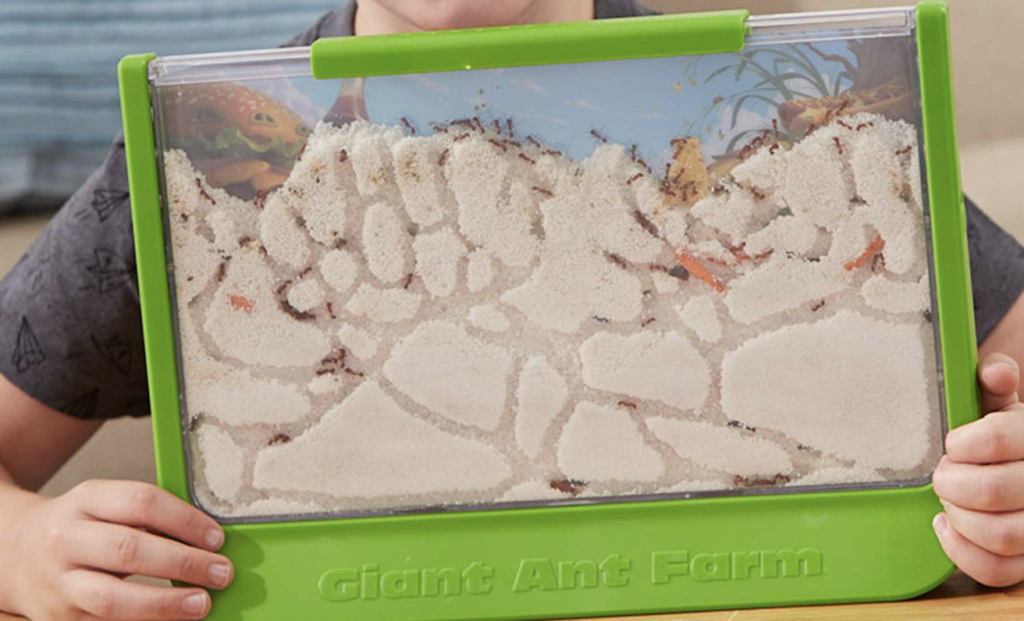
Building an ant farm is an easy and fun science project to keep the kiddos entertained and learning during the holidays, as they avidly watch the ants build an underground city of tunnels.
Not only will this collaborative and inclusive project teach your little scientists all about ants, but they will also get to venture into the great outdoors to collect the little creatures!
An ideal activity for children of all ages and interests, and allows them to share their scientific observations with friends and teachers. Each ant farm lasts for a few weeks, so this project is ideal for continued maintenance. Enjoy spending time together as a family while the ants create their own small family and showcase their intriguing life cycle and habits!
What Do You Need?
– 3 Jars (with Lids included): 1 Small Jar (That will fit inside the bigger jar), 1 Big Jar, and 1 Jar For Collecting Ants
– 1 Spoon For Collecting Ants
– 1 Jar for Collecting loose, sand-like soil
– Sand-like Soil
– Water (as all animals need water) – click here for more information!
– Cloth
– Sugar/Honey water solution to feed the ants – click here for more details!
Follow These Easy 10 Steps To Create Your Own Antfarm:
1. Poke small holes into the lid of the ant collection jar (careful – the holes must not allow the ants to escape, but must be big enough so that air comes into the jar). Parental assistance is advised at this stage.
2. Go outside and locate an anthill, or find a place where there are many ants.
3. Using the spoon, collect around 15-20 ants, and place them in the ant collection jar. Make sure not to collect fire ants, which are red! Parental supervision is advised at this stage.
4. In the same location, collect some soil from around the anthill and place it in the soil collection jar. If you are not near an anthill, collect loose and slightly moist soil from outside.
5. Bring the ants and soil home.
6. Place the lid on the small jar, and then place this in the center of the bigger jar.
7. Fill ¾ of the remaining space around the small jar with the soil. Make sure the dirt is loosely packed so that the ants can move around. Try not to make a mess!
8. Pour the ants into the big jar (now filled with soil), closing the lid tightly, and make sure to poke a few holes into the lid for oxygen!
9. To keep the ants happy and healthy, make sure to provide food and water. You can do this by filling up a test tube with water and putting a cotton ball at the end. You can also combine food and water by placing sugar water, or you can feed them fresh fruit or jam – click here for more information!
10. Cover the jar with a cloth when you are not watching the ants, as they prefer to make their tunnels in the dark!
Want More?
Little Steps Asia knows what families need.
Sign up for our email newsletters to get the most out of Asia!
VIDEO: 10 Surprising Facts About The French International School Hong Kong
-
Hong Kong
Hop Aboard The Floating Book Fair Ship Doulos Hope In Hong Kong
Explore A World of Literature & Cultural Connections Aboard The Doulos Hope2024 May 04 - 2024 May 26 -
Hong Kong
Best Family-Friendly Events In Hong Kong – April 2024
Read On For Events Not To Miss In March For Kids And Families In Hong Kong2024 Apr 01 - 2024 Apr 30 -
Hong Kong
Marvel Superheroes Return With Exciting New Shows At Hong Kong Disneyland!
Experience The Ultimate Marvel Adventure With New Shows, Attractions & Heroic Encounters!2024 Apr 26 - 2024 Jun 10 -
Hong Kong
Ministry Of Crab Brings Exclusive Pop-Up Experience To Hong Kong
Fresh Mud Crabs & Freshwater Prawns Flown From Sri Lanka2024 May 03 - 2024 May 19 -
Hong Kong
Celebrate Mother’s Day Aboard The Aqualuna Hong Kong
Dim Sum, Afternoon Tea, Champagne & Flower Planting Workshop2024 May 11 - 2024 May 12 -
Hong Kong
Get Ready To Boogie At Nordic Night – Eurovision Dance Party In Hong Kong
Celebrate A Night of Glitter, Glamour, And Groovy Beats!2024 May 11 - 2024 May 11 -
Hong Kong
Your Guide To Upcoming Concerts In Hong Kong & Macau In 2024
Live Music Performances, Concerts And Festivals You Wouldn't Want To Miss2024 Jan 01 - 2024 Dec 31 -
Hong Kong
INVITE: Attend An Elementary School Campus Tour At Stamford American School Hong Kong
Save The Date: May 162024 May 16 - 2024 May 16 -
Hong Kong
Events & Things To Do On Mother’s Day In Hong Kong 2024
Things To Do On Mother's Day In Hong Kong -
Hong Kong
INVITE: Join A Guidepost Hong Kong Open House
Save The Date - April 202024 Apr 20 - 2024 Apr 20
SIGN UP
Hong Kong Tips, Deals + Events.
Got kids? Little Steps Asia gives you the scoop on all the things to do and see with babies, toddlers, and kids in Hong Kong, Singapore, Kuala Lumpur, Bali, Jakarta, Macau, and beyond. From family-friendly hotels, kids and baby shops, the best schools and after school activities, pregnancy tips and meet-ups and more – we have you sorted.
Sign up to receive the free Little Steps email newsletter packed with news, offers, and hidden treasures for Hong Kong families.
© 2024 Little Steps Asia. All rights reserved.


